DJANGO-sign in page with OTP verification via email
While learning a framework ,creating mini projects helps us to explore the features of the framework.Now,we are going to create a simple sign-in page with email verification using Django.At the end of this blog,you will get an insight about the django database connections,django forms,django sessions,django email architecture and few crud methods like get and post.Let’s get started.
Find the source code: https://github.com/VIKASHVARR/signin-blog
Setting up the project:
First of all,create a virtual environment for our django project to isolate it from other django folders.Then,create a new django project in the command prompt

Then,open the project folder in your test editor.In my case,it is vs code
Create a new app with my name.In my case,I name it home
\>>python manage.py startapp home
Create a view which will render a html page where the user will be entering their personal details for signin.Create template folder inside the app to store the html pages.Create a html page inside the templates and name it as home.html.Join the templates with the base directory in settings.py file

Map the view function with a url by creating a urls.py file inside the app and map the app with the main project by including the urls.py file into the urls.py file of the main project.

view to render the signin page
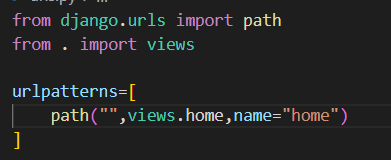
view function is mapped with home page
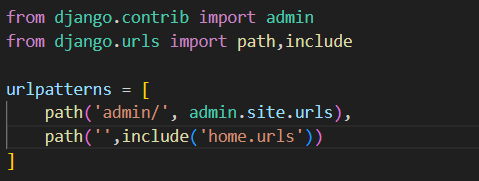
app’s url.py file is included to the main project’s url file
Signin view:
Now,we work on html page to get the user details.Here,we use html forms to get the user details.HTML forms takes two arguments,Action and method.Action is used to indicate where the data has to be sent whenever the form is submitted.Usually,we send the data to a view to process the data.Here in the views.py file ,we gather the data and store it in a DB table.Method indicates how the data to be sent.Usually there are two common methods to send the data to the views-GET and POST.GET method is used to send the data as a url variable.Since,we want to send personal details and passwords,we don’t use get method because passwords should be sent securely.Thus we use POST method to send the data securely.
Ok,Now,we set the inputs for the forms.This includes first name,Last name,User name,Email,password,Confrim password.Here, in the back-end ,we will check for unique username creation and password -confrim password match.
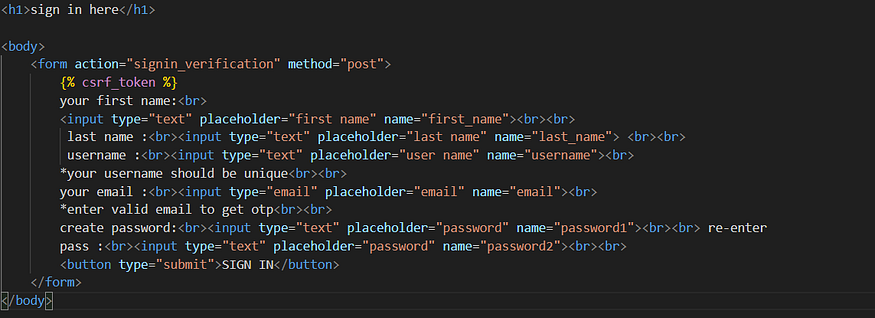
signin html page for getting user details
Here,csrf token has to be used whenever we are using post request.This csrf token is stored in server side application.The server side application ensures the token created while user login matches the token stored on the server side thus ensures data security and prevents csrf attacks.Once the submit button is clicked,The data will be sent to signin_verification views.
Now,Coming to the forms,All the details needed for user sign-in are received and will be sent to the signin_verification view.
We wanna create a view called signin_verification(you can name it whatever you want) and wanna map it to a url in urls.py file.
In signin_verification view,all the data are received from the form and stored to the corresponding variables via http post method.
database connection:
If all the details are valid,where will be the user data stored? Thus database connections is required.Here,I am using Mysql as my DB but you can use whatever you are familiar with as django supports almost all of the DB available.Now,let us set up the DB.
Go to settings.py,There,you can see the Database section,

The default DB issqlite3,we wanna change it as we use Mysql.The altered database configuration will be
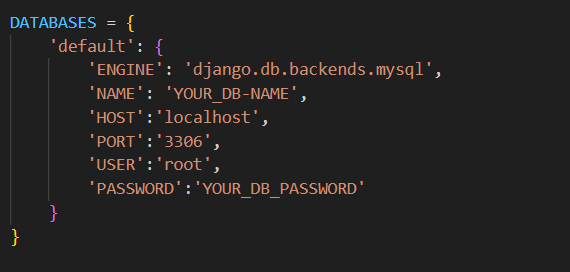
Here,we wanna create a database for our app,this can be done by executing the following command in Mysql workbench
\>>create database DB_NAME
Now,provide your user name and password as the user and password values in the database section.Now,our database is ready to use.Here,we have a special feature in Django.We don’t wanna create seperate tables for storing user ceredentials.Django will create default tables for user,permissions and groups.We just wanna migrate them to the database to store data and use them.Here,to migrate data,we have to execute two commands,
\>>python manage.py makemigrations
This command will indicate that a new table is created or changes has been made in the existing table and tables are ready for migration.(This is similar to git init method)
This command will migrate the new tables and changes to the database
The tables that are created are:
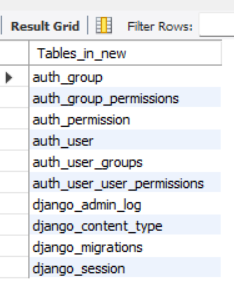
tables
Here,in auth user ,all the user details will be stored
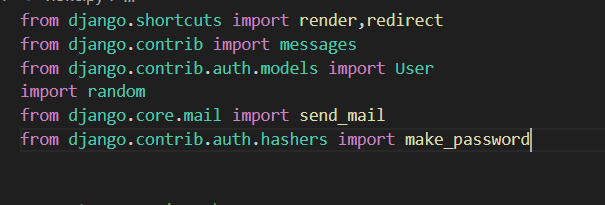
We have to import the above modules and methods for our app and the usage of these methods will be discussed below,
Now,lets look into validation and otp verification
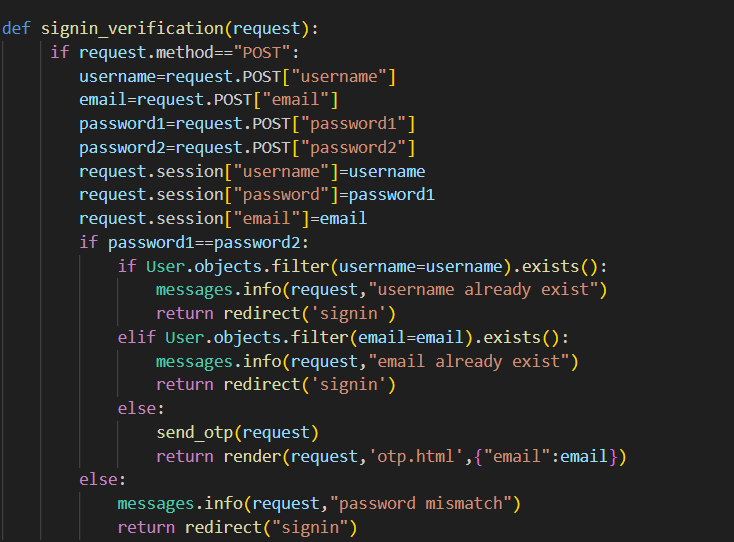
signin view to verify the data and send otp
Here,all the meta data are stored in variables and ready for validation,First of all,we check for password -confrim password match.If both mismatches,then an error message will be popped up notifing that the password mismatches.message.info() is used to process the error message and the message display method will be written in html page to display the message(discussed below).If the passwords matches,we check for unique username ,if username is already taken,we should insist the user to take a different username.Here,ORM(Object Related Mapping) is used to query the database.User is the table name and User.objects.filter() is used to select the tuple with the parameter given,Here the parameter is username and here we will check for tuple with the username with the username passed.exists() method returns True if the username is already in the table indicating that the username is taken.Similarly,email is also verified.If the email is taken,then error message will be popped up.If all the ceredentials matches,otp verification process will be launched.
message handling:
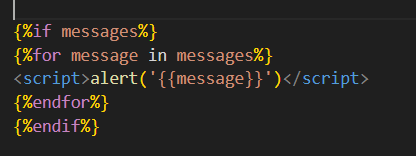
js is used for script messages.Included in home.html
Here,we pass the message to the html page and the above code is used to display the message.
Email verification:
To send an email ,we have to set up few things in settings.py

Include these things ,notifing the host name,port name and other email details.
How to get email_host_password?
To get the host password,First go to your google accounts and go to security.There,enable two-step verification.After enabling two step verfication,search for app passwords in the search bar,go to app passwords and there, select others from the drop box and name the app and click generate.A password will be generated.Copy that and paste it in the email settings.
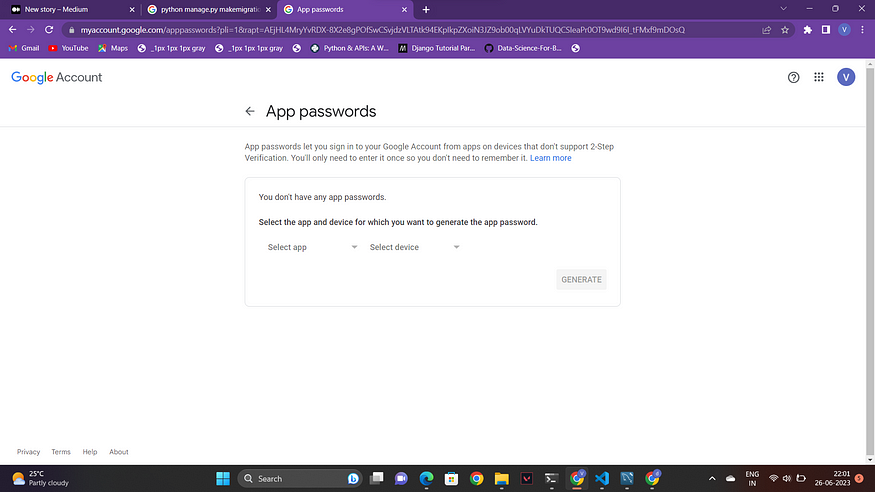
Accounts->Security-> app password
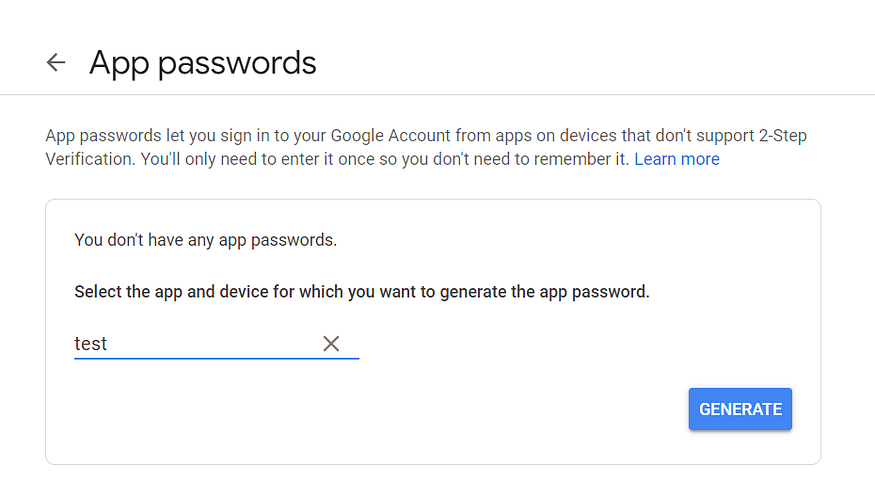
enter an app name and generate a password
Now,lets write the view to send the otp.

send_otp view to send opt and render to the otp html page where user can enter the otp receivered.
In the above function,we generate a 4 digit otp pin using a for loop and the email is sent via send_mail() method.This method should be imported
\>>from django.conf.core import send_mail
send_mail() takes five arguments.
— The subject of the mail
— The content of the mail.Here the content is otp
— The sender mail id
— the receiver mail id
— fail_silently() is used to terminate the process without any breakdown if the process fails.
Then,this view will render a html page where the user enter their otp for verification.Create a html file inside the templates.Here,I create a file named otp.html

html page to get the otp from the user
Create a form to get the otp from the user.The data should be sent to a view named otp_verification for the verification process.

view for otp verification and data storage
In the otp_verification() view ,we check whether the entered otp matches the otp send by the send_otp() view.We use sesssion to increase the scope of the otp variable and thus otp comparison is made.
Django Session:
Sessions are used to pass the variables across the website.It is more or less similar to cache machanism.Here,we use sessions for passing username ,email ,password from the signin_verification views to otp_verification views(can be used across all views) to store the data in the database.Session variable is created for otp to share it to otp_verification views.
In the opt_verification view,if the otp matches,the details should be stored in the database.How could we do that?It is simple to store the data.Just use the table name and pass the values.
\>>name=User(username=username_variable,email=email_variable,password=encrypted_password)
\>>name.save()
To save the details to the DB,use .save() method.Here,the password is encrypted.This is because,while authenticating the user during log-in we use,auth.authenticate() method to check for the username and password in the DB,Here,this method(auth.authenticate)will convert the password to encrypted password and check for the encrypted password in the database.If we store the data in text form,the password will not match with the password passed through auth.authenticate[encrypted password] even though your password is correct.Thus keeping this in mind,we store the password in encrypted form.Password can be encrypted by using the method make_password
\>>from django.contrib.auth.hashers import make_password
\>>encrypted_password=make_password(users_password)
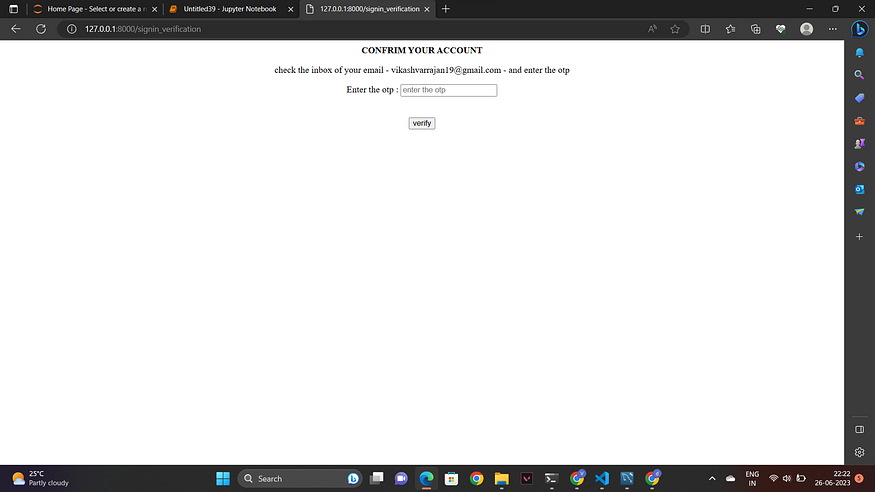
page for otp
The opt will be sent to the user’s email.
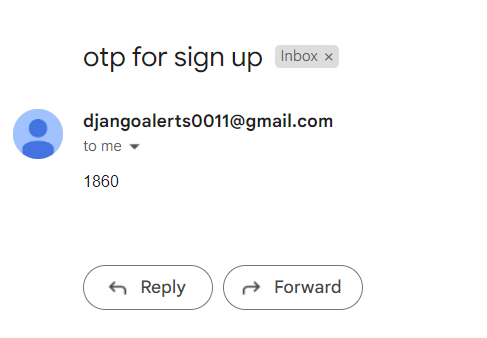
otp received
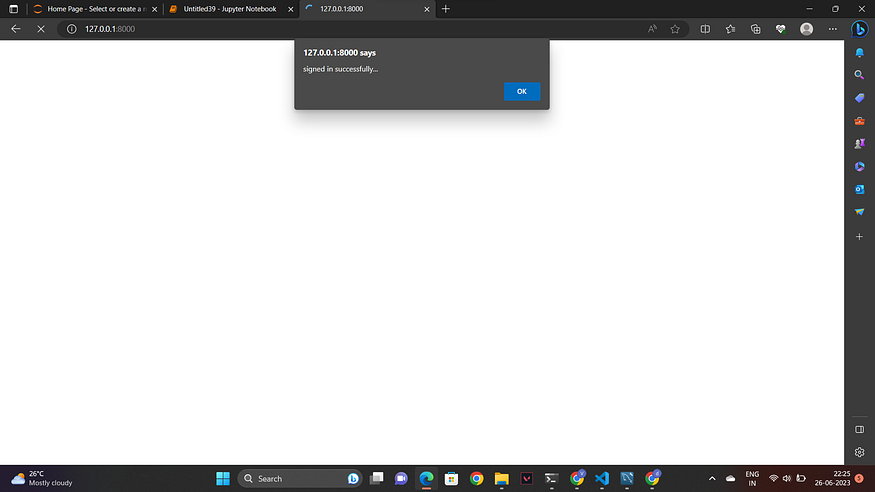
When the otp is verified,a pop up will notified that the signin was successful and the user will be created and the data will be stored in the database.
In the next blog,lets create the login page and add some dynamic html pages to our page.
Summary:
Created a signin page
Configured database
Configured email
Otp verification
Data stored in DB