Build your first app using django


Table of contents


No headings in the article.
Let’s create our first app using Django in a structured manner.
It is always suggested to provide a virtual environment for each Django project you create.Ok,now why virtual environment?The reason for creating a virtual environment for each Django projects is to isolate each project and eliminate dependencies.For example,If you are given a django project that uses an older version of Django,You have to switch to the older version of Django.It’s fine for one project.But ,what if you are working on multiple projects?You should change your Django version each time .Thus ,creating virtual environment helps you to install the dependencies of the projects in the specific virtual environment and you don’t want to make changes everytime as the virtual environment has the dependenies of the particular project ready in the project’s own environment.Thus,each project has its own requirements ensures isolation.Now,let’s create a virtual environment.
First install the virtual environment,
\>>pip install virtualenv virtualenvwrapper-win
To create a virtual ennvironment,use
\>>mkvirtualenv name
To work on the virtual environment, use
\>>workon name
Now,we can create our first app using django,To create an app,use
\>>django-admin startproject project_name
Use a text editor to work,here,we are going to use VS code.To move your project to the VS code,use
\>>code .
or simply,you can drag and drop your folder or go to VS code
— — file
— — — — — —open folder
— — — — — — — — — select folder
OK,now we can start building our app.As you progressed this long,you can see few files in the folder.
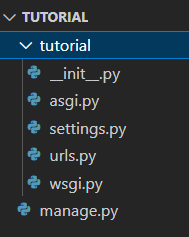
Files that are created
Here,__init__.py is to indicate that the directories are python based and the files are marked as python files.
wsgi.py and asgi.py are required so that web app can communicate with web server.ASGI is the advanced feature of Django which allows multiple async event to communicate.[These topics will be discussed in a seperate Blog]
settings.py has the app settings where you can make database connections,add the template sessions and allow the web host to host the app,add middlewares and much more.While practical applicaton,we can go through all the options available in setting.py.
urls.py is used to map the sub apps to the main project.A project is divided into several sub apps.Each apps will do a certain job.For example,in a e-commerce project,we may have separate app for login/sign-in,a separate app for products/purchase and a separate app for other applications.Using Urls.py ,we can map all the apps to the main project.
manage.py is the command line utility for django apps.
Here,python manage.py is the command line utility and runserver is the sub comment to run the app on the localhost.
we can use \>>help subcomment to get all the common subcomments
Now,To create a seperate app,we can use
\>>python manage.py startapp test1
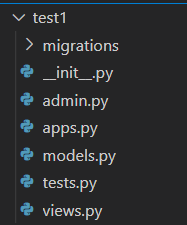
Here,we need to create a file named urls.py inside our app to map all the views to their specific urls. and finally this urls.py file will be included in the main project’s urls.py .Views are the functions which will be called when the mapped url is triggered.For example, if ‘/home’ url is called,then the function mapped with the url will be called and the body of the function will be executed.

On right click on the app,with new file option,we can create new file and name it urls.py.
In urls.py ,we have to import path(to map the views) and views
from django.urls import path
from . import views(.(dot) indicates current directory)
Then ,use urlpatterns to map views to the urls
urlpatterns=path(‘/url’,views.view_name,name=”name”)
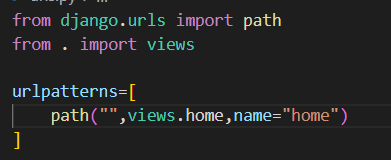
path is used to map and “” represents home page.
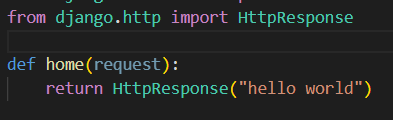
In views, we write our first function which simply prints a Http response on our web page
def home(request):
return HttpResponse(“hello world”)
OK,Now,we have to map the app to the main project,To do that,go to urls.py in the main project and import include to include the app’s urls.py file to the main app
path(‘’,include(“test1.urls”))

Now, we have to add our app to the installed apps in the settings.py file,
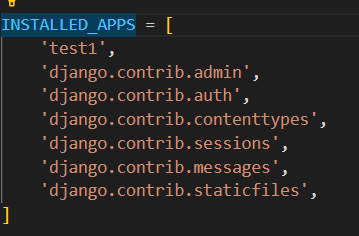
our app test1 is added successfully,Now,we can run our app using

The app is running in the above ip(localhost-port 8000) and you can use any browser to run the app
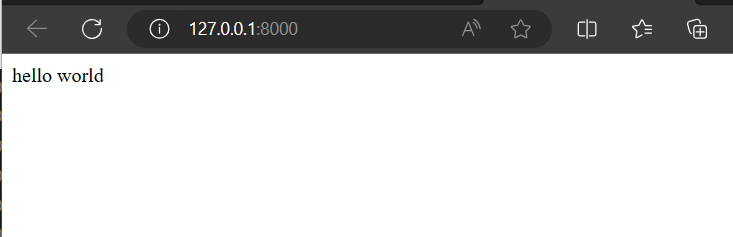
Our app is launched successfully in the localhost and HttpResponse is displayed.YEAh,we have created our first django app.This is our first move and in the upcoming blogs,we are going to create a fully functioning real world django app.
Summary:
— Create a django project in a virtual environment
— Create an app inside the project
— Create urls.py file and map the views
— Map the app to the main project
— Run the server